This is a quick guide on how to free up storage manually on your mac.
Table of Contents
- Check Current Storage
- Remove unused apps
- Free up Developer space
- Remove unused documents
- Empty the Trash
- Related Articles
- Featured in
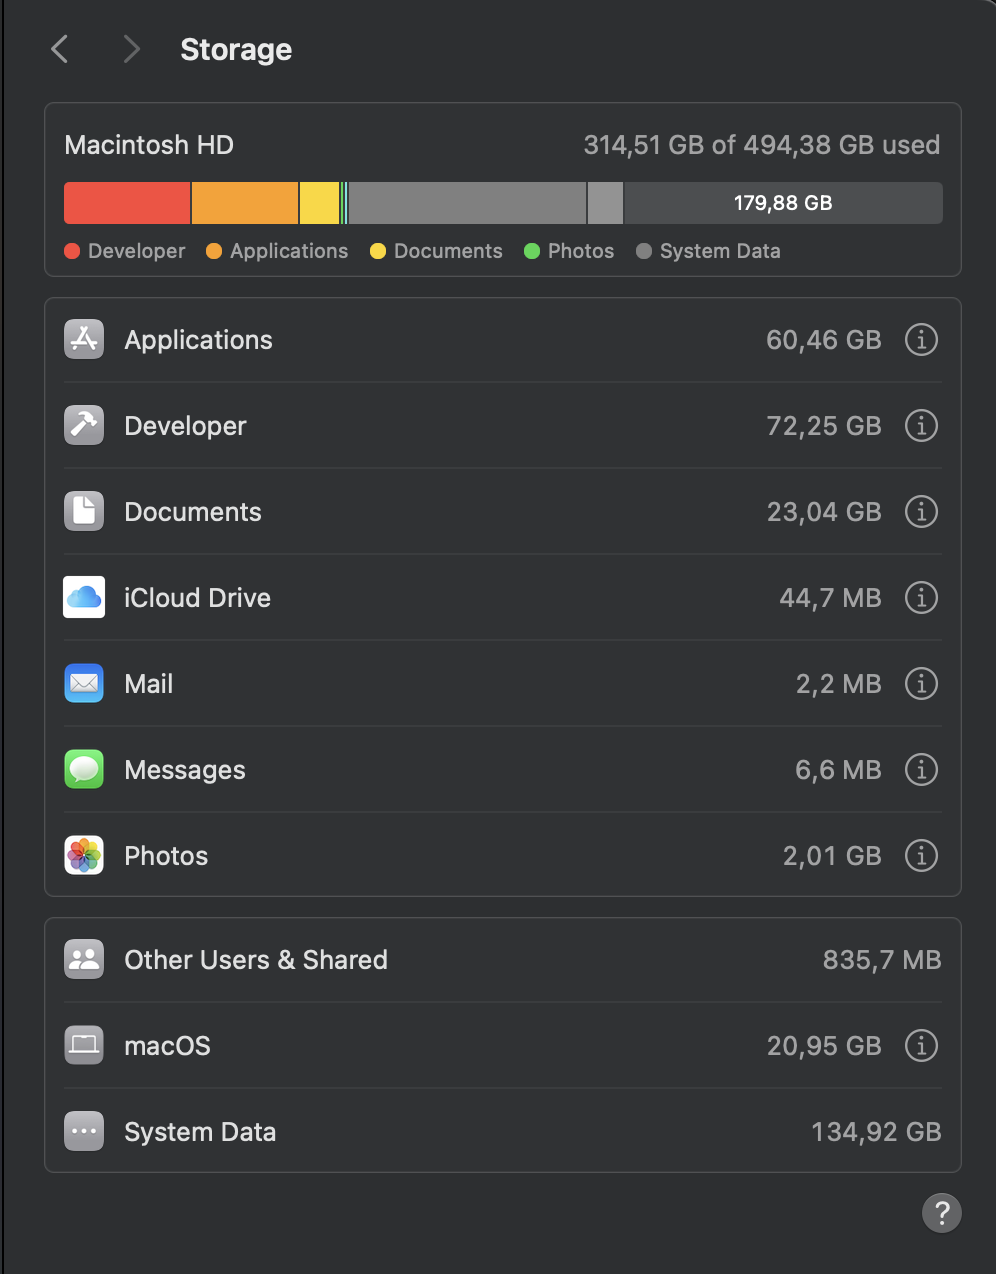
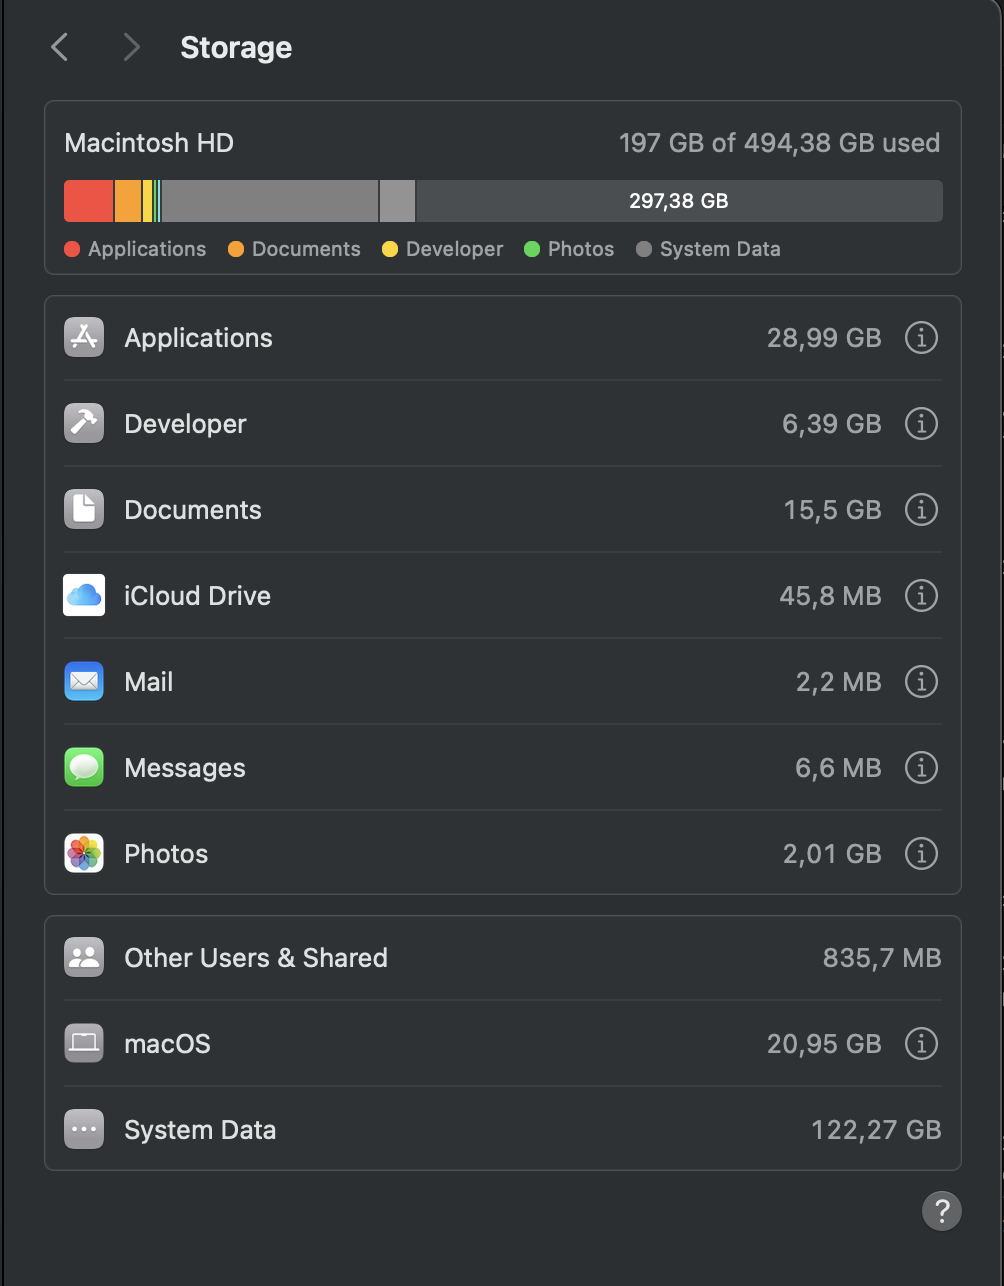
Check Current Storage
First, go to System Settings -> General -> Storage:
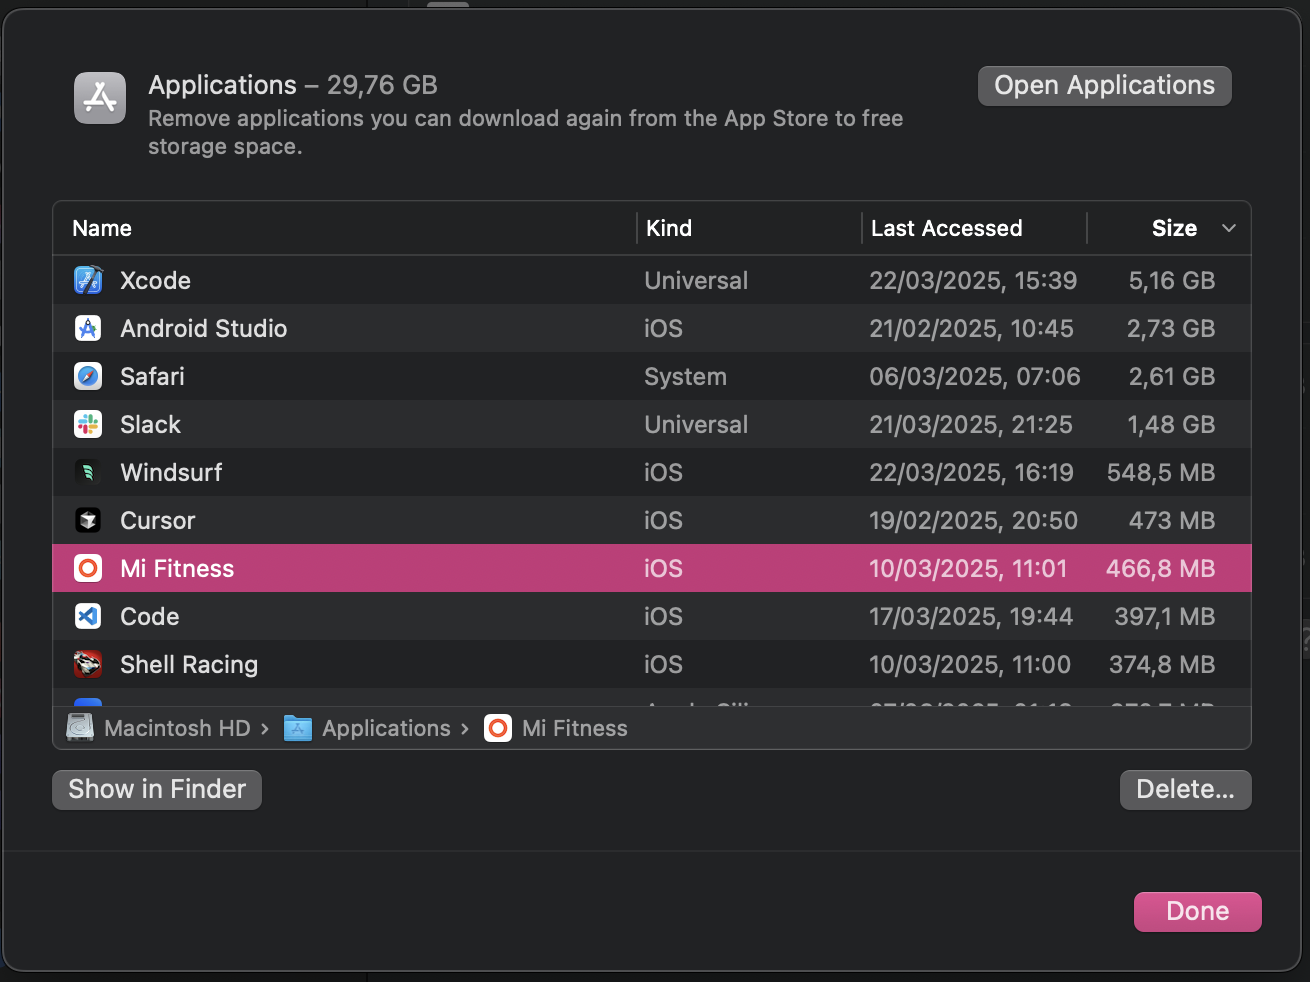
Remove unused apps
Tap on the info icon next to the Applications row, and delete the apps that you don’t use anymore.
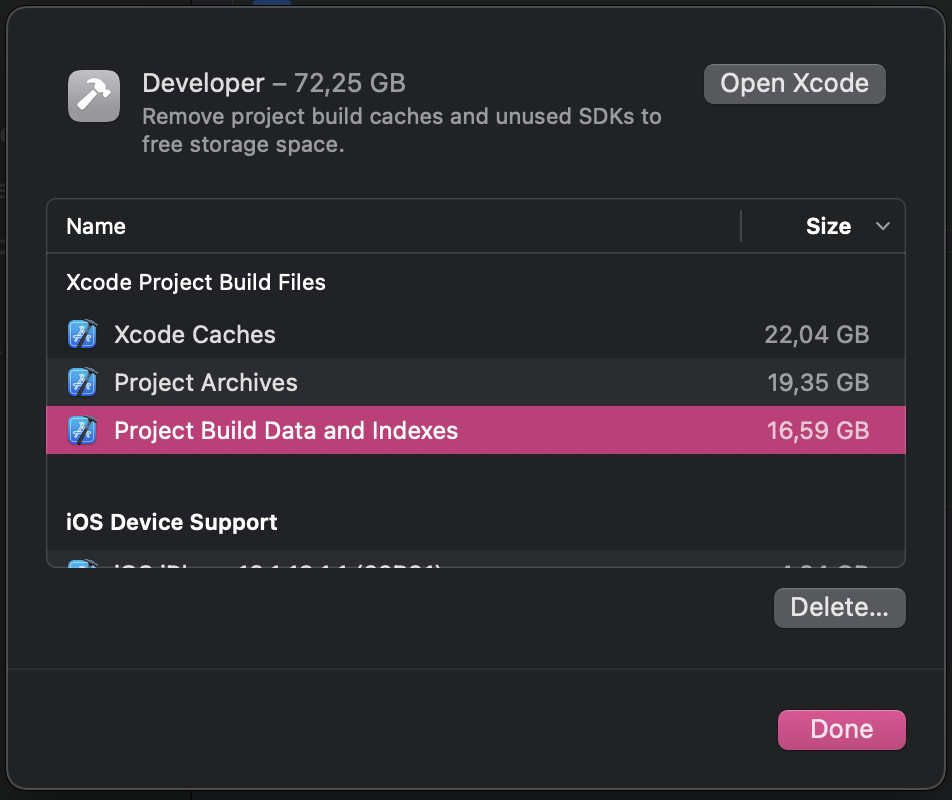
Free up Developer space
Tap on the info icon next to the Developer row:
- Remove Xcode Caches
- Remove Project Archives
- Remove Project Build Data and Indexes
- Remove older iOS Device Support
- Remove Derived Data in the console:
rm -rf ~/Library/Developer/Xcode/DerivedData - Empty the Trash
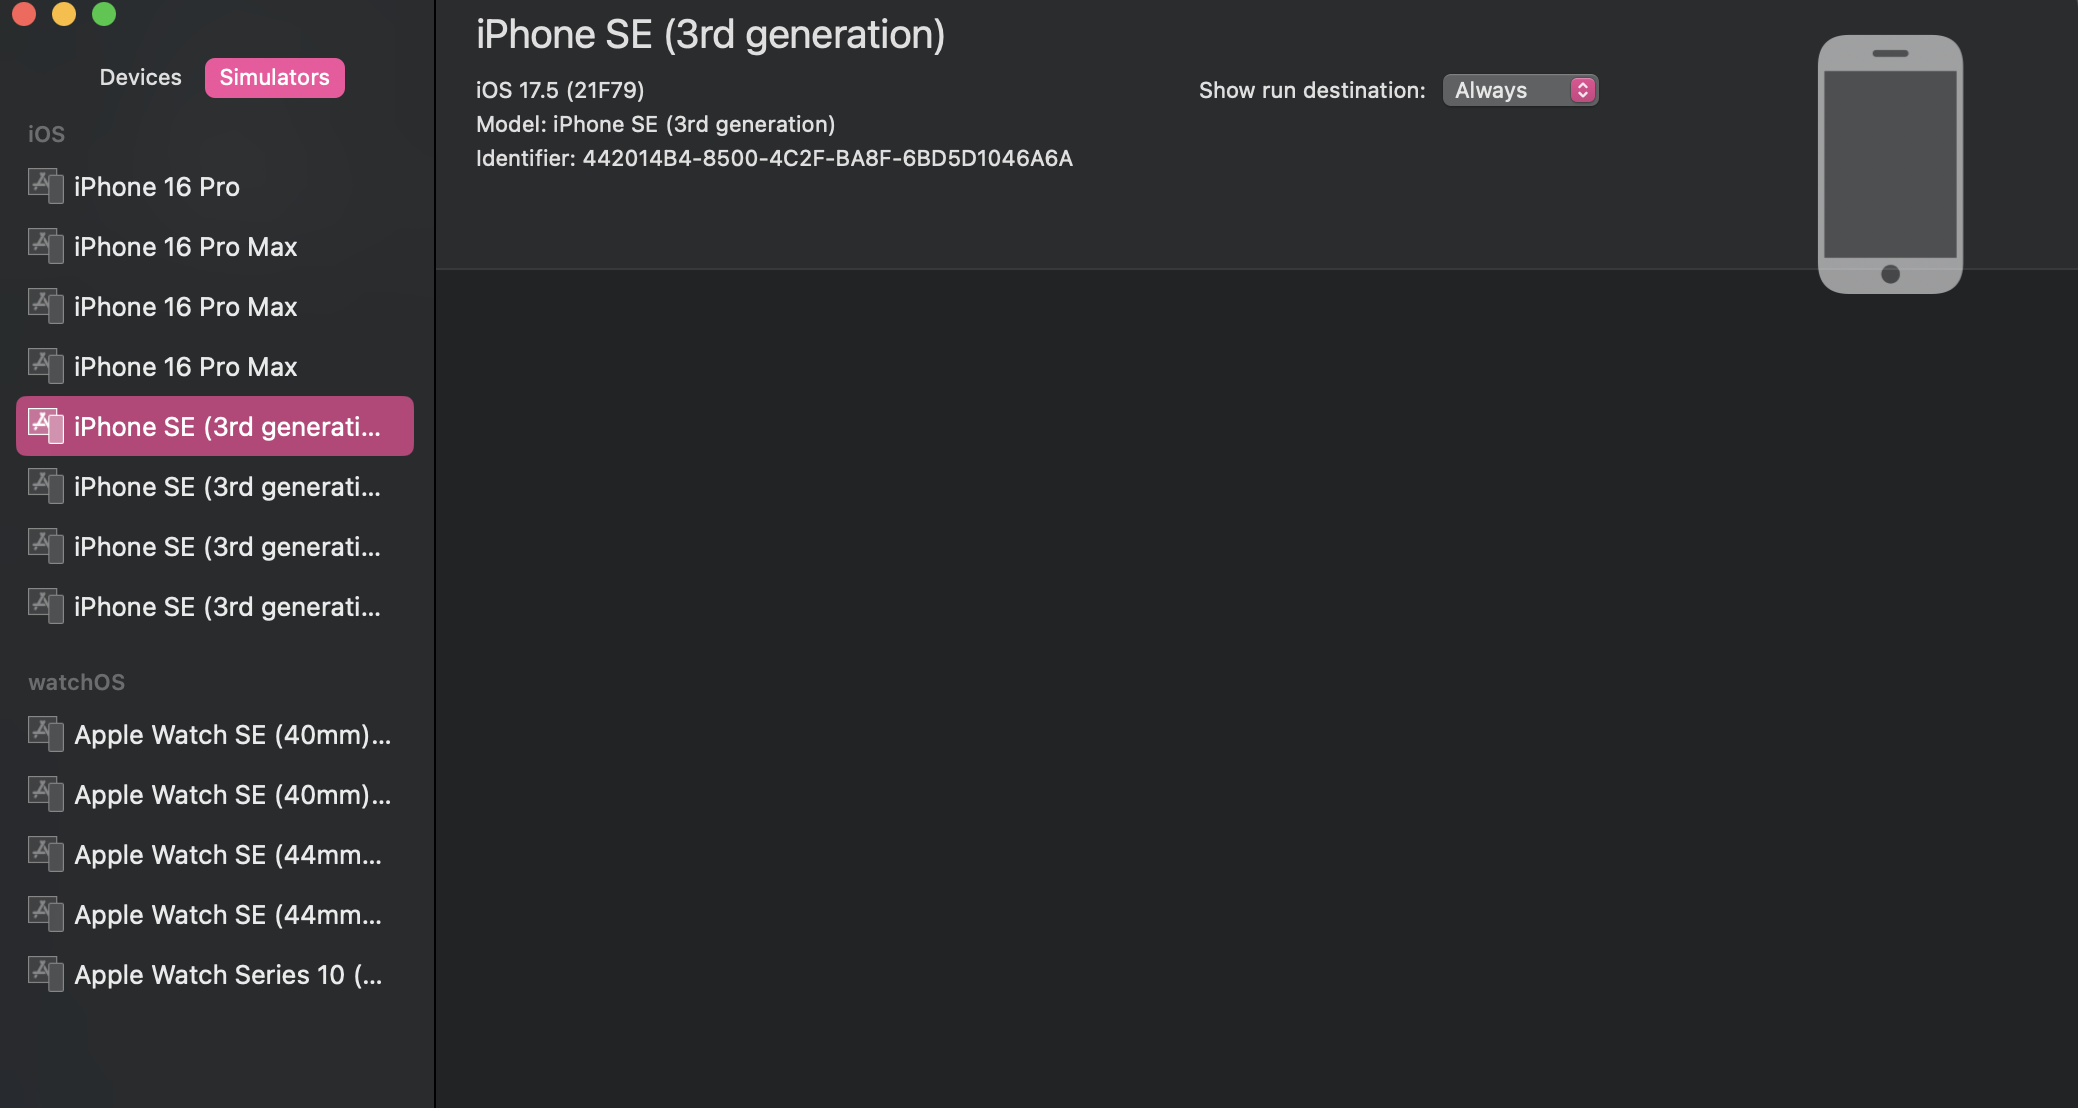
Additionally, you can navigate to ~/Library/Developer/ and manually delete simulators, os versions, or other stuff that may taking up too much space.
If you don’t like removing stuff from that folder, you can go to Xcode -> Manage Run Destinations and delete the simulators that you don’t use anymore:
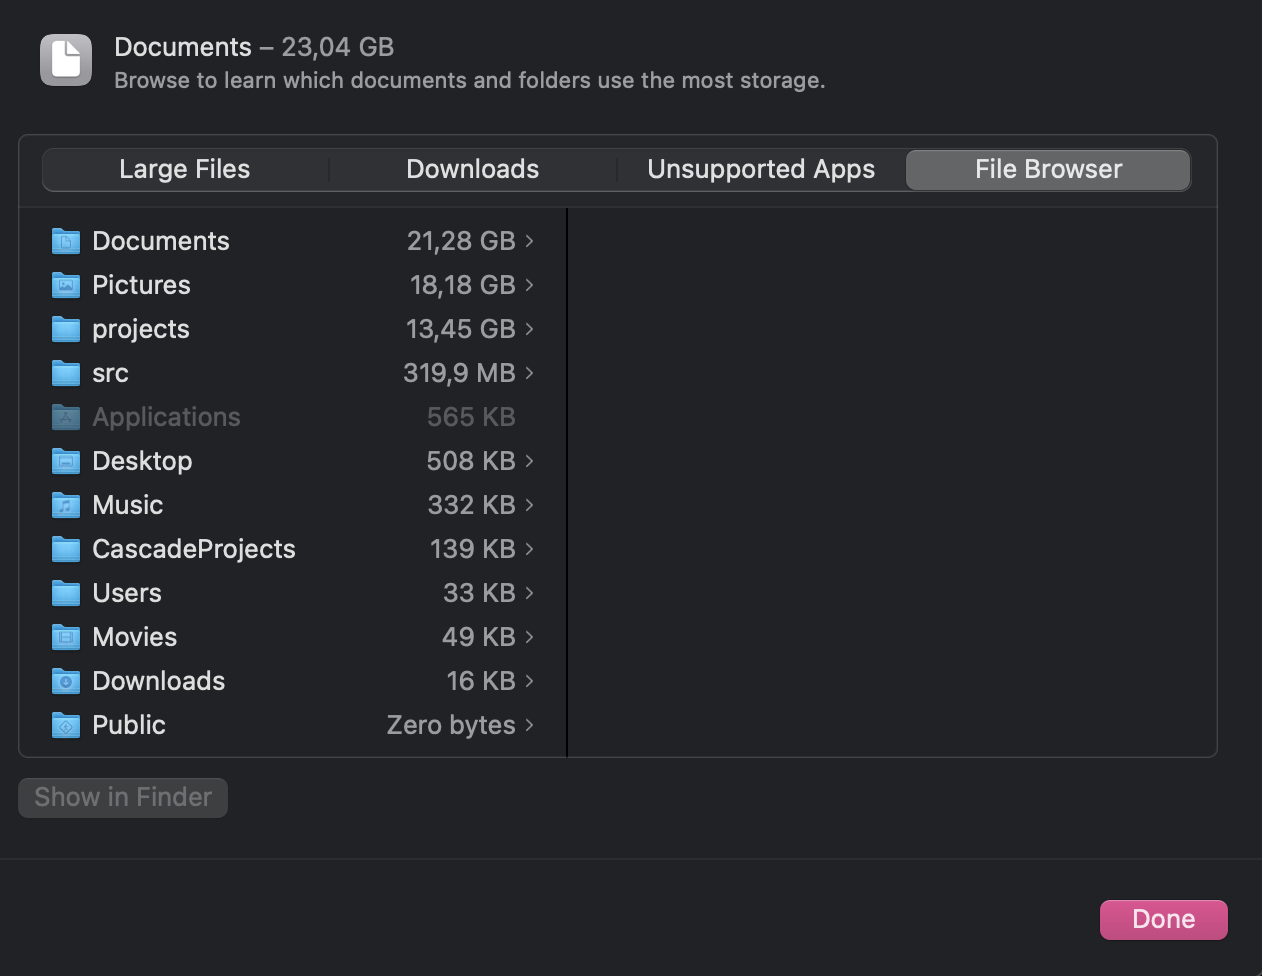
Remove unused documents
Tap on the info icon next to the Documents row, then navigate to the File Browser tab, and delete the documents that you don’t use anymore. Remember to turn on the Show Hidden Files option in the top left corner (or press Cmd + Shift + .).
You can remove the Caches under Library -> Caches that usually take up a lot of space.
There is a lot of space used in the .build folders of Xcode Projects.
Empty the Trash
Finally, empty the trash, and check again the final storage:
In just a few minutes, we managed to free up ~118GB of space without using any external tool.
I hope you find this guide useful. If you have any questions or comments, please let me know via Twitter or email.